In the world of real estate, every space comes to life even before the first bricks are laid, thanks to 3D modeling. This technique makes it possible to create your most ambitious projects digitally.
It is developed in several stages, ensuring that the developer's vision is respected. 3D computer graphics specialists are on hand to turn your ideas into reality, from the creation of the basic shapes to the presentation of the final rendering.
This article explains how to create a 3D model.
Step 1: Building the project backbone
3D building modeling is carried out using computer-aided design (CAD) software. This first stage consists of creating sketches and putting them into volume.
Basic data collection
As a first step, your graphic designer collects the project data you wish to materialize. He gathers together the various construction plans, such as :
- Architectural plans
- Scale plots
- Paper plans
- Technical drawings
In addition to your plans, he also collects other relevant elements such as topographical surveys, reference images or photographs of similar constructions to get a precise idea of the aesthetic details of the building and the materials that will be used.
In the end, these elements enable us to offer you a 3D model that is faithful to your expectations. All this information is carefully studied to give you a realistic representation of the project.
Creating basic shapes
Using the dimensions extracted from the architectural plans and the appropriate CAD software, your 3D graphic designer begins the modeling process byestablishing basic structures such as interior/exterior walls, floors, rooms, openings and other main structural elements.
Basic structures are designed from 2D drawings with measurements or architectural plans.
Our 3D experts will design a plan view of your model in CAD software. These 2D views are used to lay out the interior layout of a building level.
Shapes and dimensions will be based entirely on the information gathered, to ensure the utmost precision in every detail of the building.
If you already have a plan or sketch in DWG, DXF, PDF or JPG format, you can use your architectural plans directly as a layer to extract a sketch. This sketch will be the basis for creating the volume. To faithfully reproduce the shapes, a computer graphics designer will :
- Define the contour ;
- Drawing partitions, walls and facades;
- Resize lines if necessary to full scale.
2D shape extrusion in 3D
Extrusion is a fundamental step in the design of a 3D model. It's the step that creates three-dimensional structures from simple flat shapes that have been drawn beforehand, forming a solid base for construction.
To give volume to your model, your graphic designer extrudes walls and facades in a vertical direction to create thickness and height. Extrusion parameters are specified on the basis of distances included in your architectural plans.
Once the skeleton of your building is complete, he integrates the details that will help make your model more realistic.
Step 2: Adding architectural details
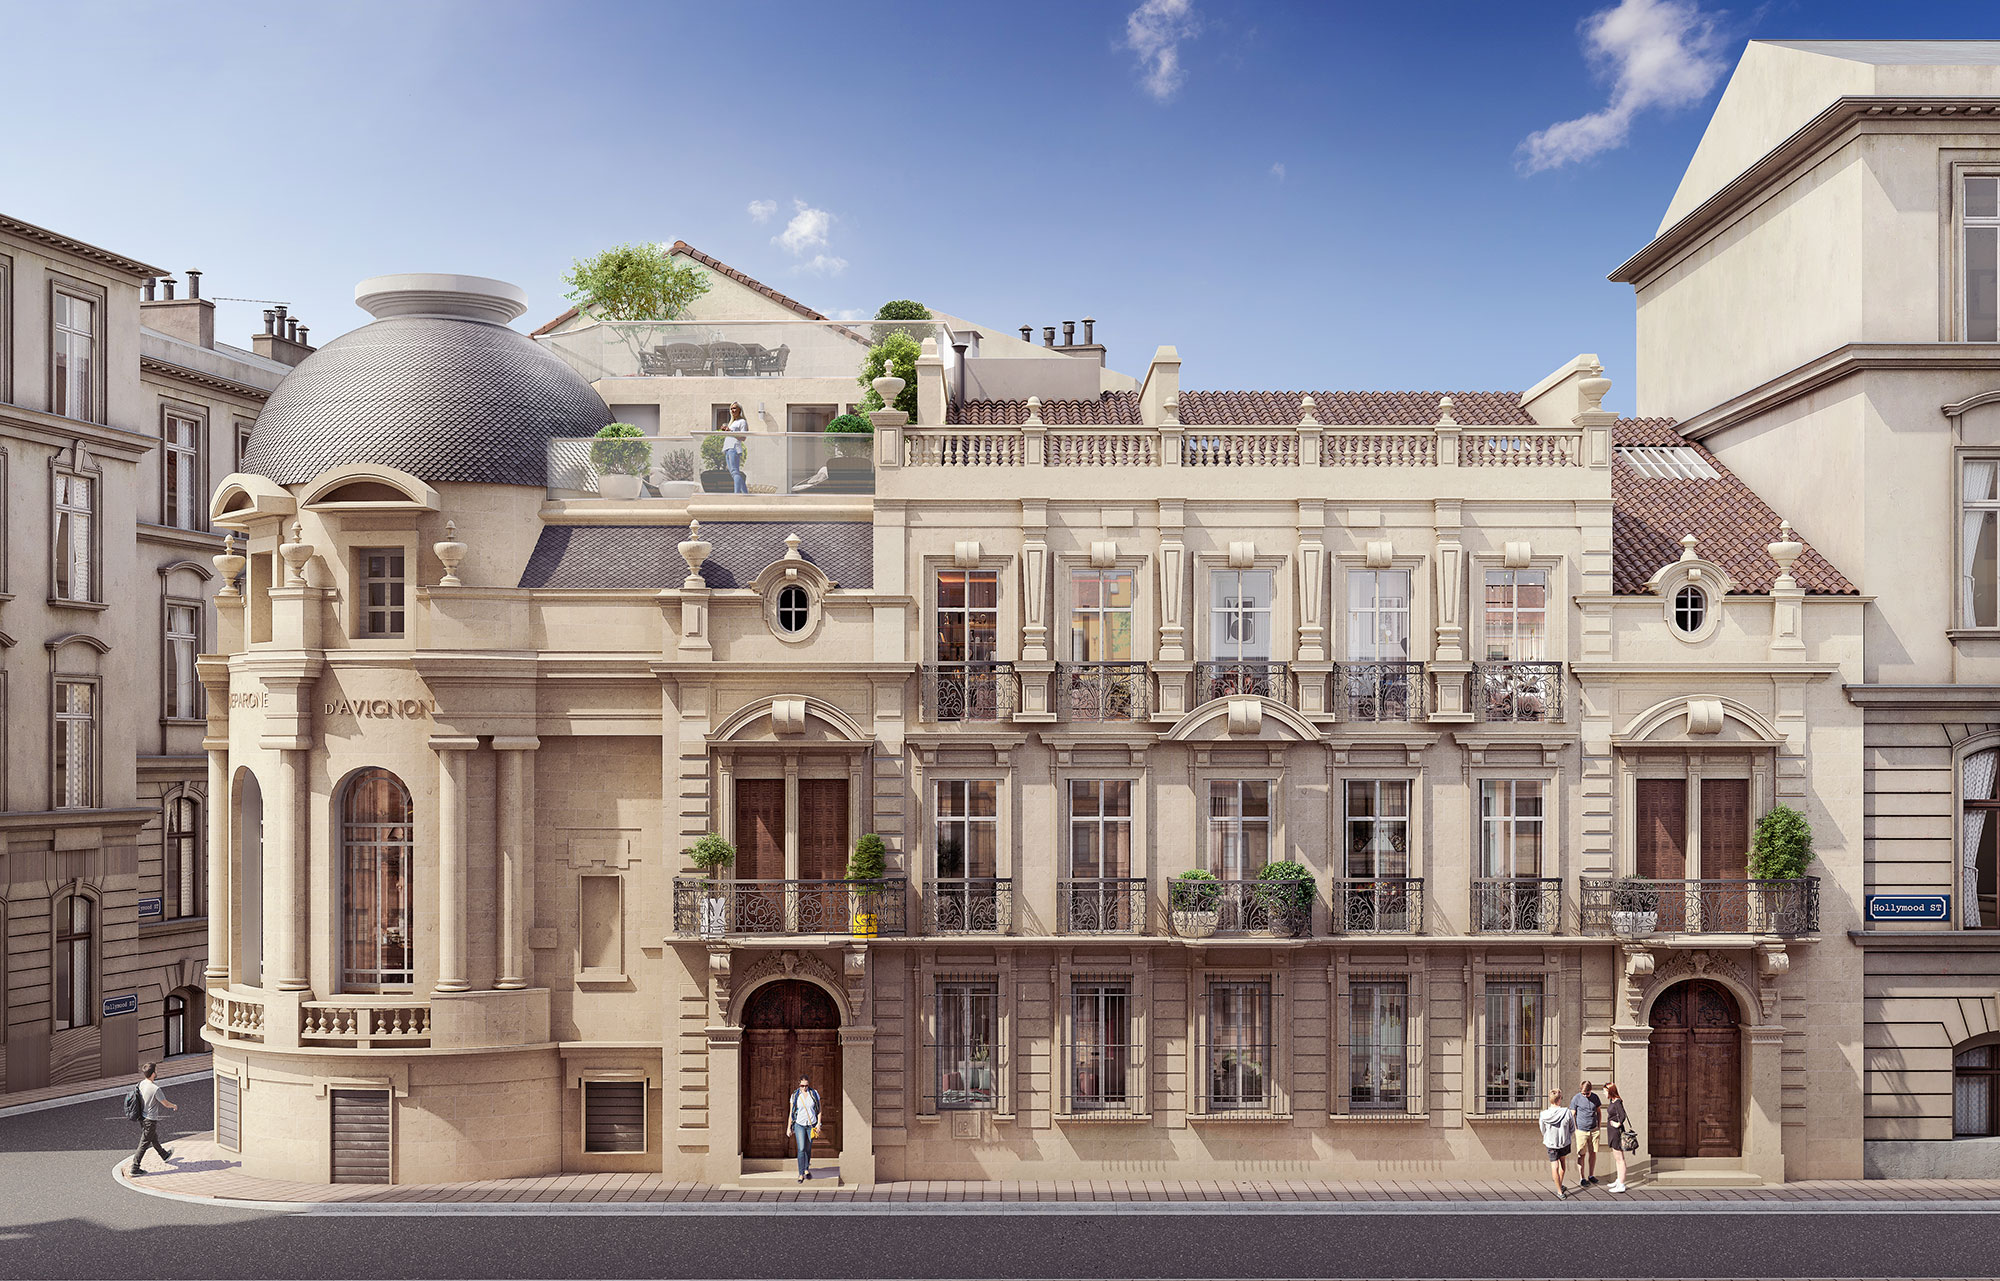
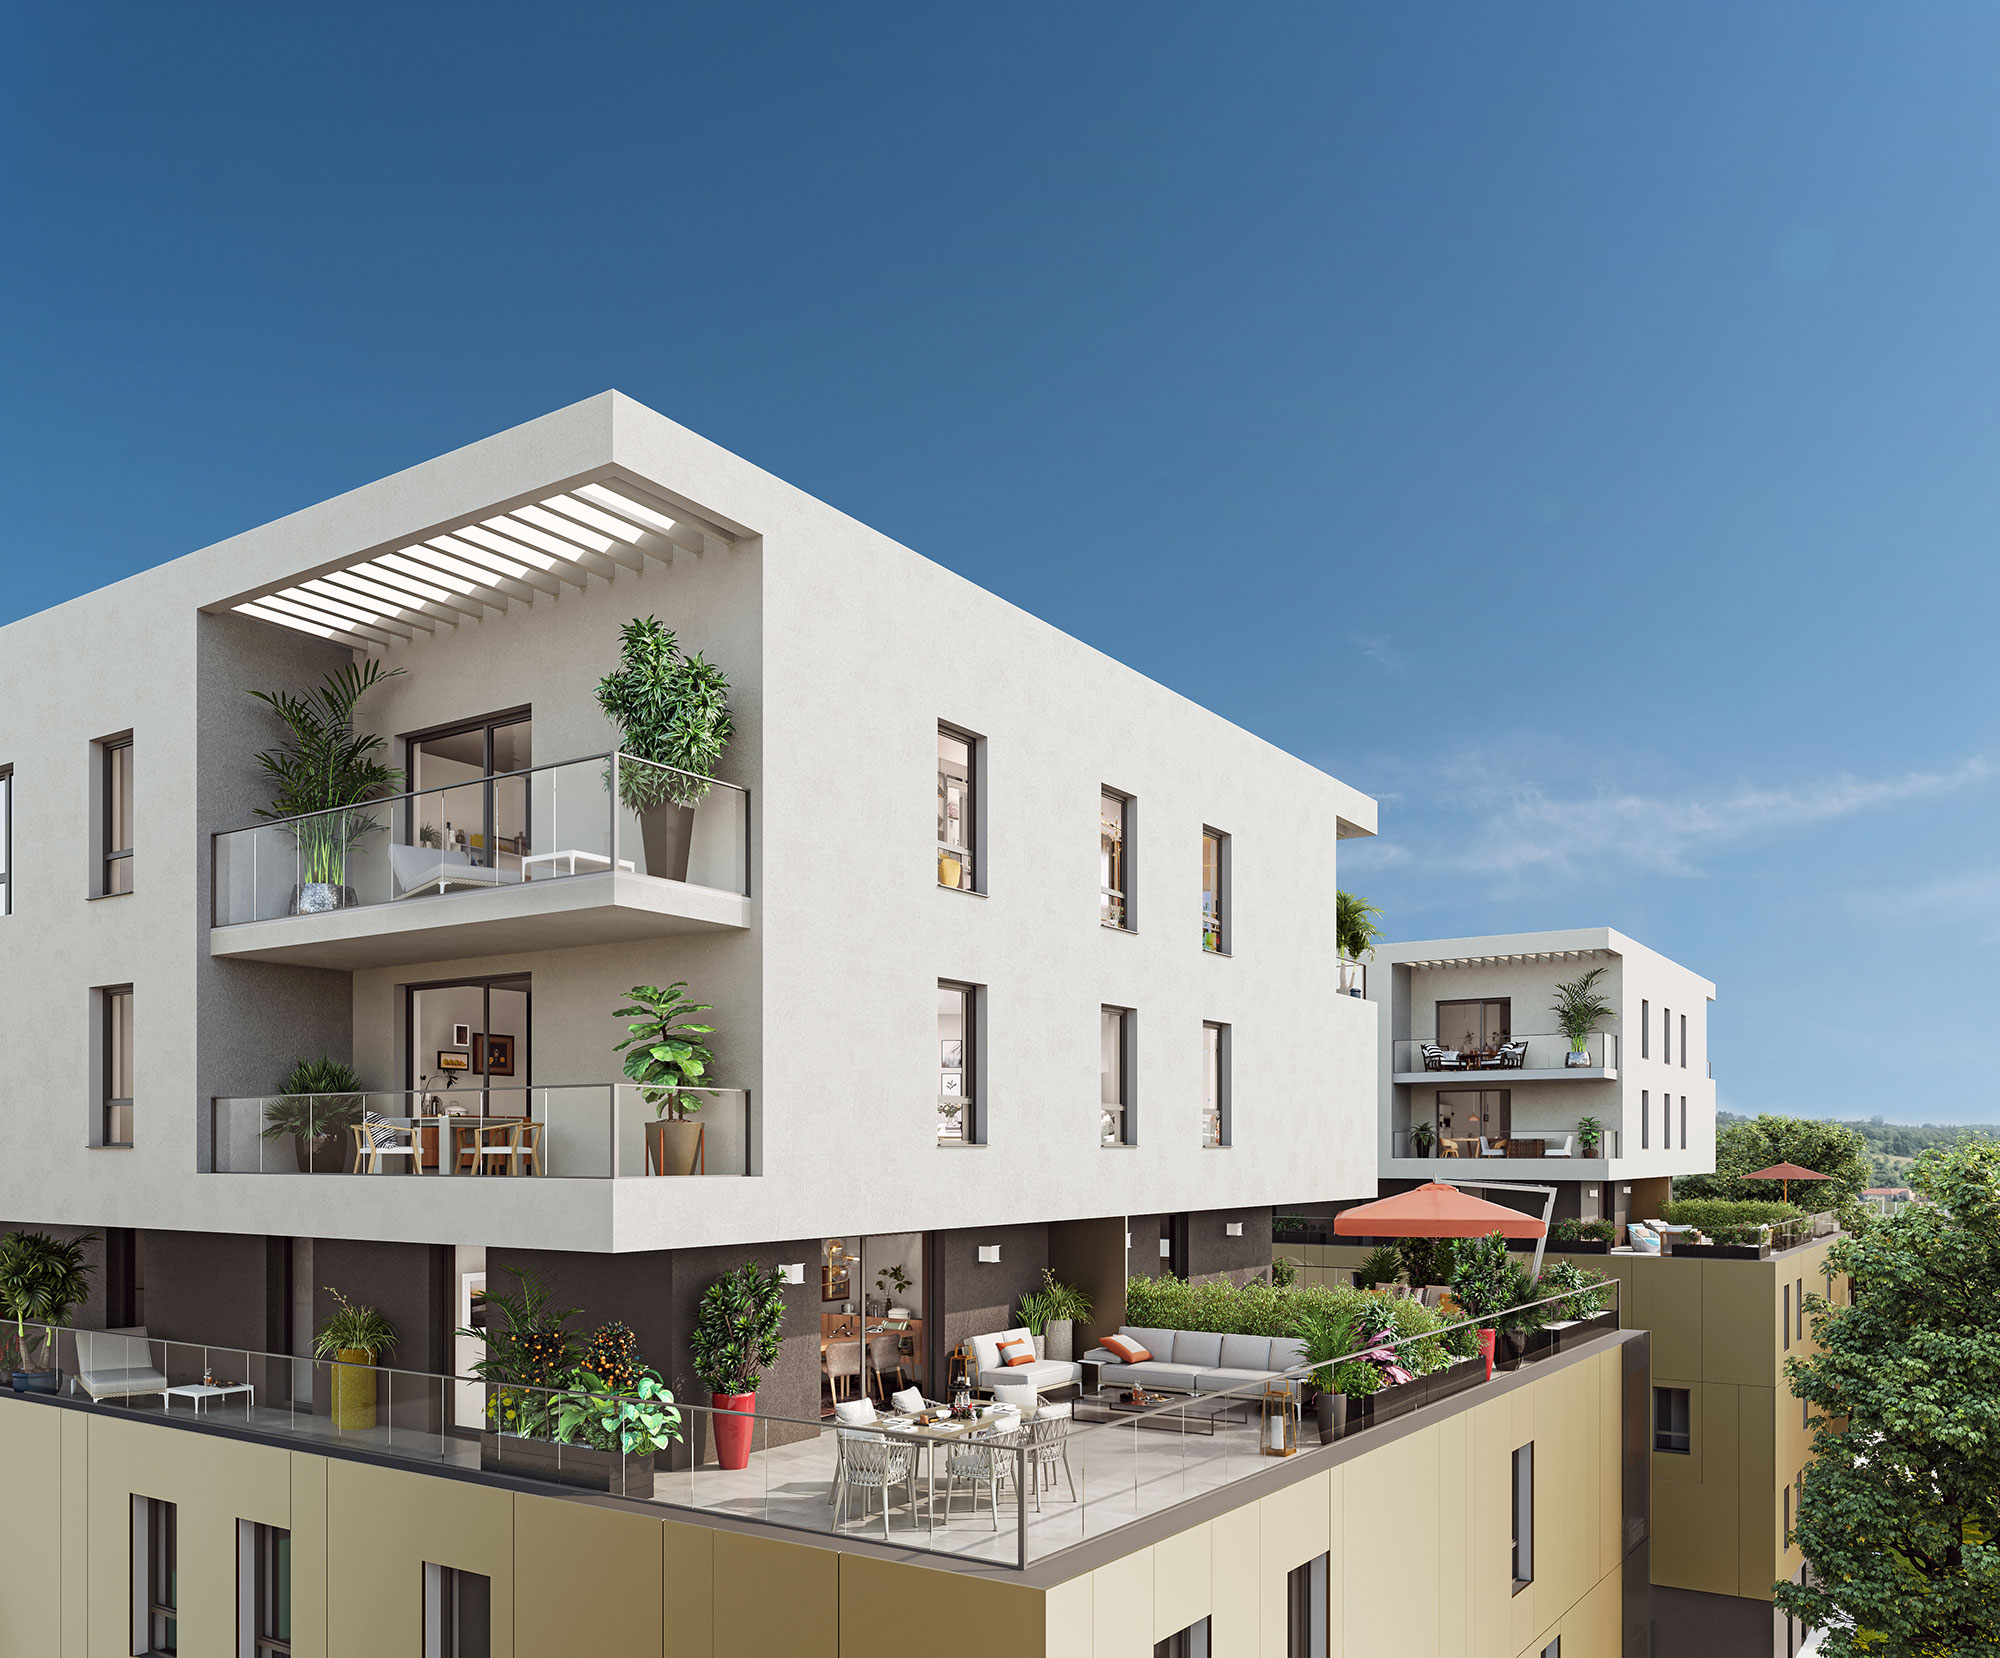
Architectural details are the elements that bring your project to life. Each detail is meticulously modeled by our computer graphics specialists to give you a realistic, immersive representation of the 3D model.
Modeling openings
Combining utility and decoration, openings are of crucial importance in 3D real estate models. Inserting different types of openings (doors, windows, skylights) allows you toappreciate the overall aesthetics and addrealism to your 3D model.
To do this, the specialist follows several steps:
- He analyzes architectural plans to determine their dimensions, locations and shapes.
- It integrates the data in the software to create a realistic representation of doors and windows with the representation of real materials used for construction: frames in wood, metal, PVC, aluminum or other; different types of glazing;
- He places and adjusts openings in walls or facades according to your architectural plans.
These openings give you a more realistic view of your real estate project.
Foundation modeling
After the openings, the 3D model creation process involves the digital creation of the building's support structure. This includes the foundations of your future building.
This helps you to understand the layout and strength of the foundations, and to plan the plumbing systems. In the model of your project, you'll see load-bearing columns, threaded footings and insulated footings.
Modeling the roof
The presentation of a detailed roof maximizes the appeal of your model. To accurately visualize the exterior appearance of your building, the 3D computer graphics artist integrates all the components of a real roof with the interior ceilings:
- Roofing materials in tile, slate, metal, wood, thatch or concrete according to your preferences;
- Decorative finishes such as eaves, dormers, chimneys, roof edges, cornices or glass roofs add character and style to your project;
- The gutter system.
Step 3: Presenting the rendering

In the process of creating a 3D model, 3D graphic designers use advanced rendering parameters to create an immersive visualization of your model. These parameters include components for texture enhancement, exterior rendering and interior rendering.
The texture
Dressing your model with different textures simulates the real appearance of the materials. It brings your model to life.
To transform a simple representation into a gripping visual experience, our graphic designers select realistic textures ranging from the smoothest to the roughest, as well as colors.
Based on the details gathered during information gathering, they select the textures determined for :
- Outdoor flooring (paving stones, stone slabs, gravel, wood, lawns, earth);
- Interior flooring (wood, tile, carpet, concrete, stone, vinyl),
- Wall texture (brick, stone, wallpaper, wood, paint or mosaic);
- Ceiling materials: wood beams, stucco ceilings, coffered ceilings.
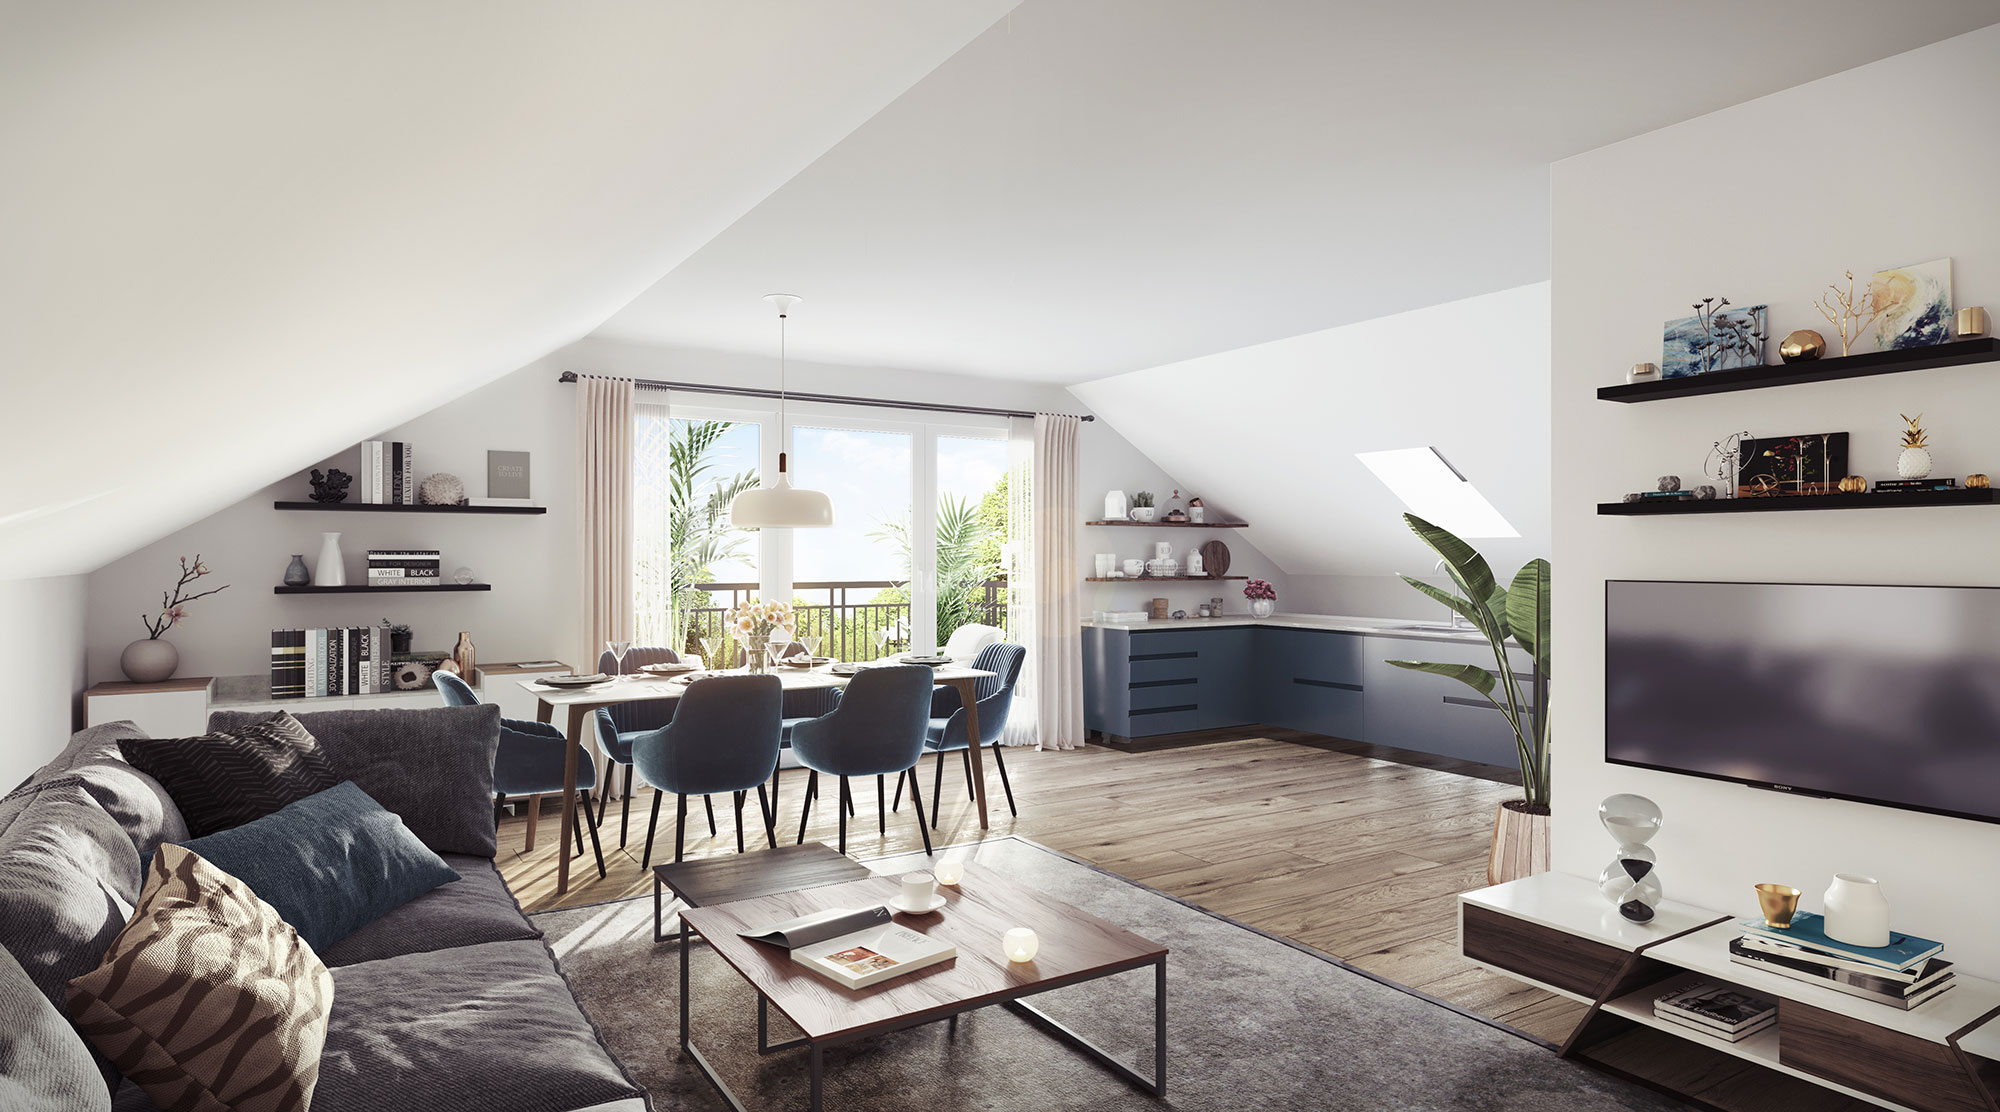
Interior rendering
To create an immersive and convincing visual representation of your model, the texturing expert integrates important elements such as :
- Furniture, accessories and decorations such as cupboards, tables, chairs, plants, pictures, mirrors... ;
- Lighting with natural light diffused through windows or artificial light such as lamps, wall sconces, luminaires..;
- Shadows and reflections of objects ;
- Architectural details.
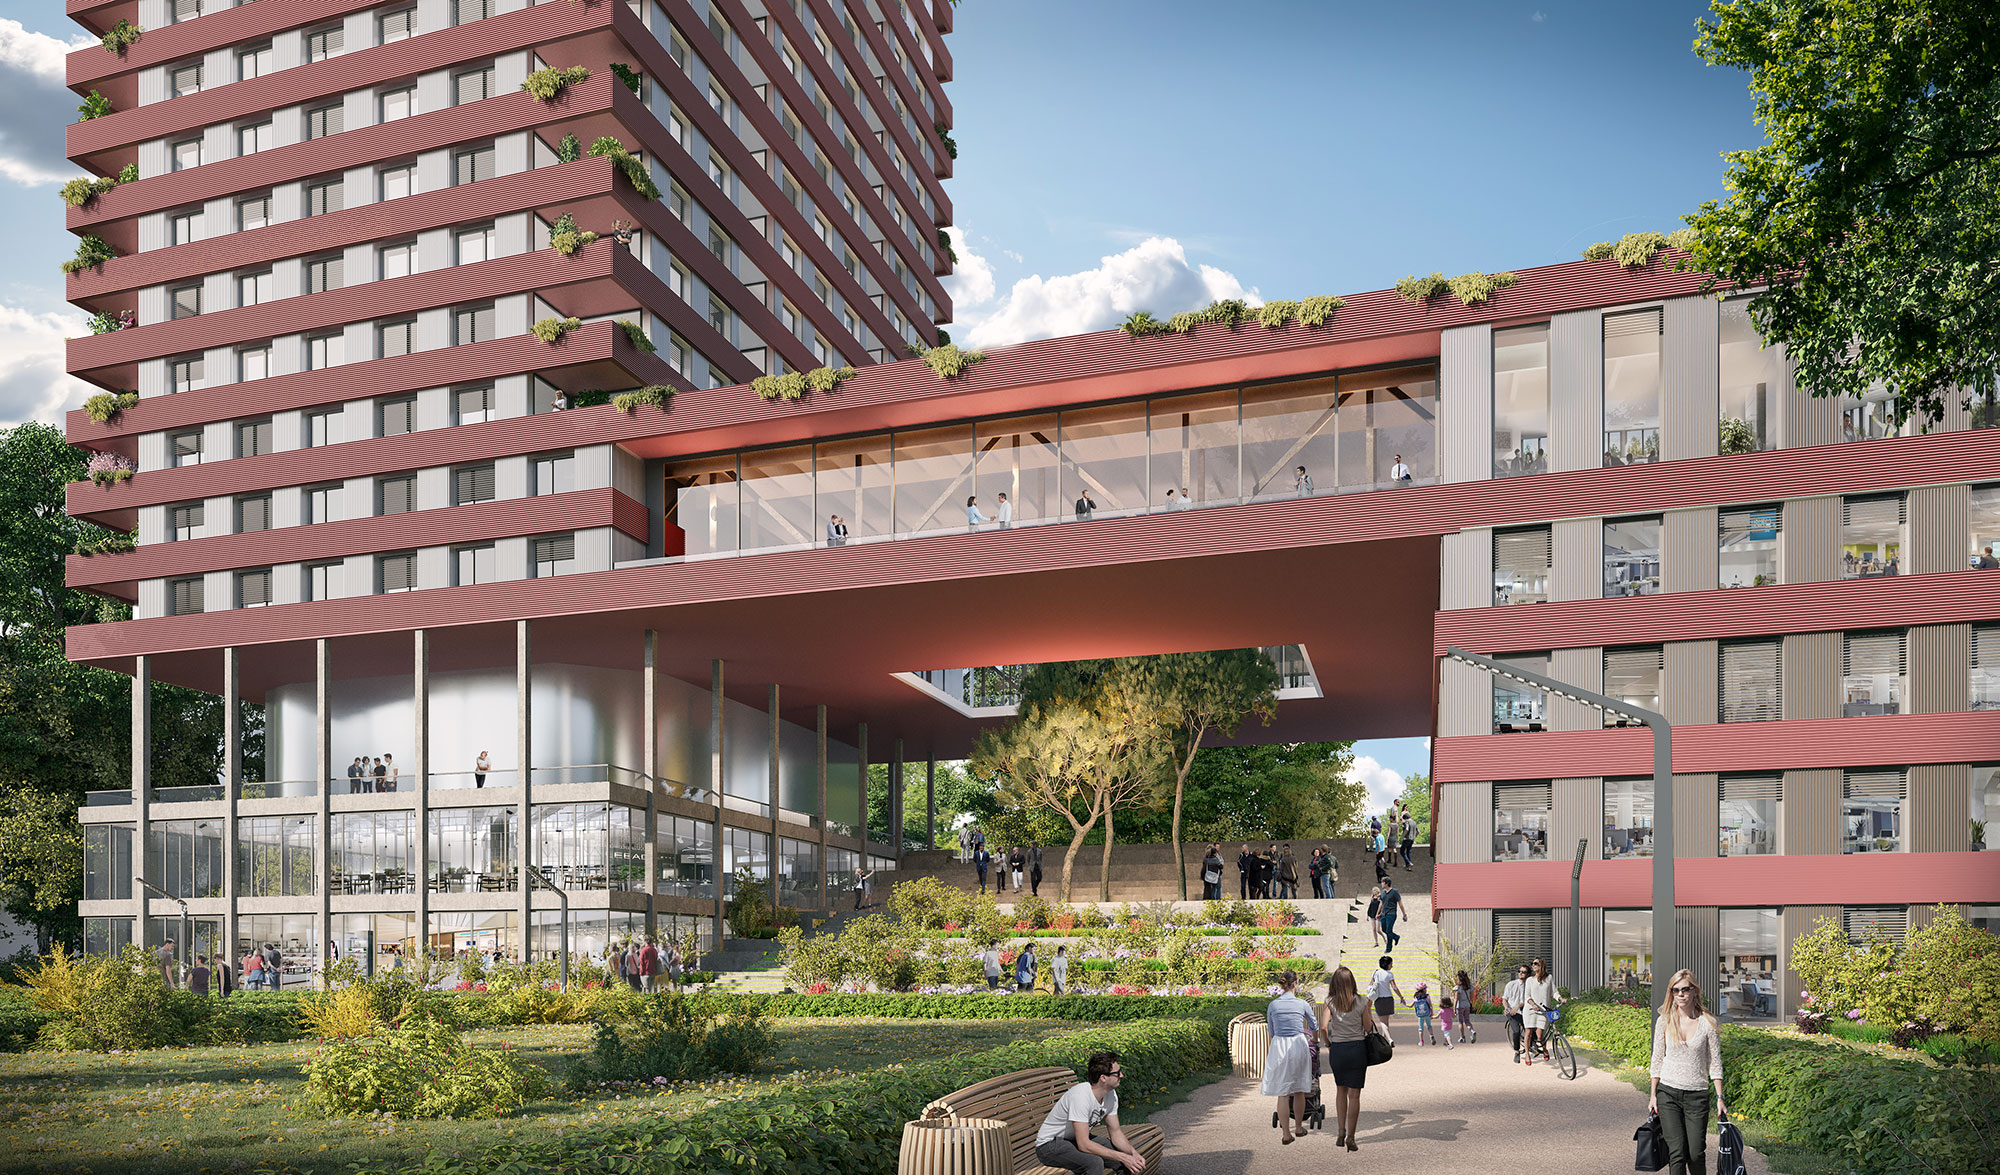
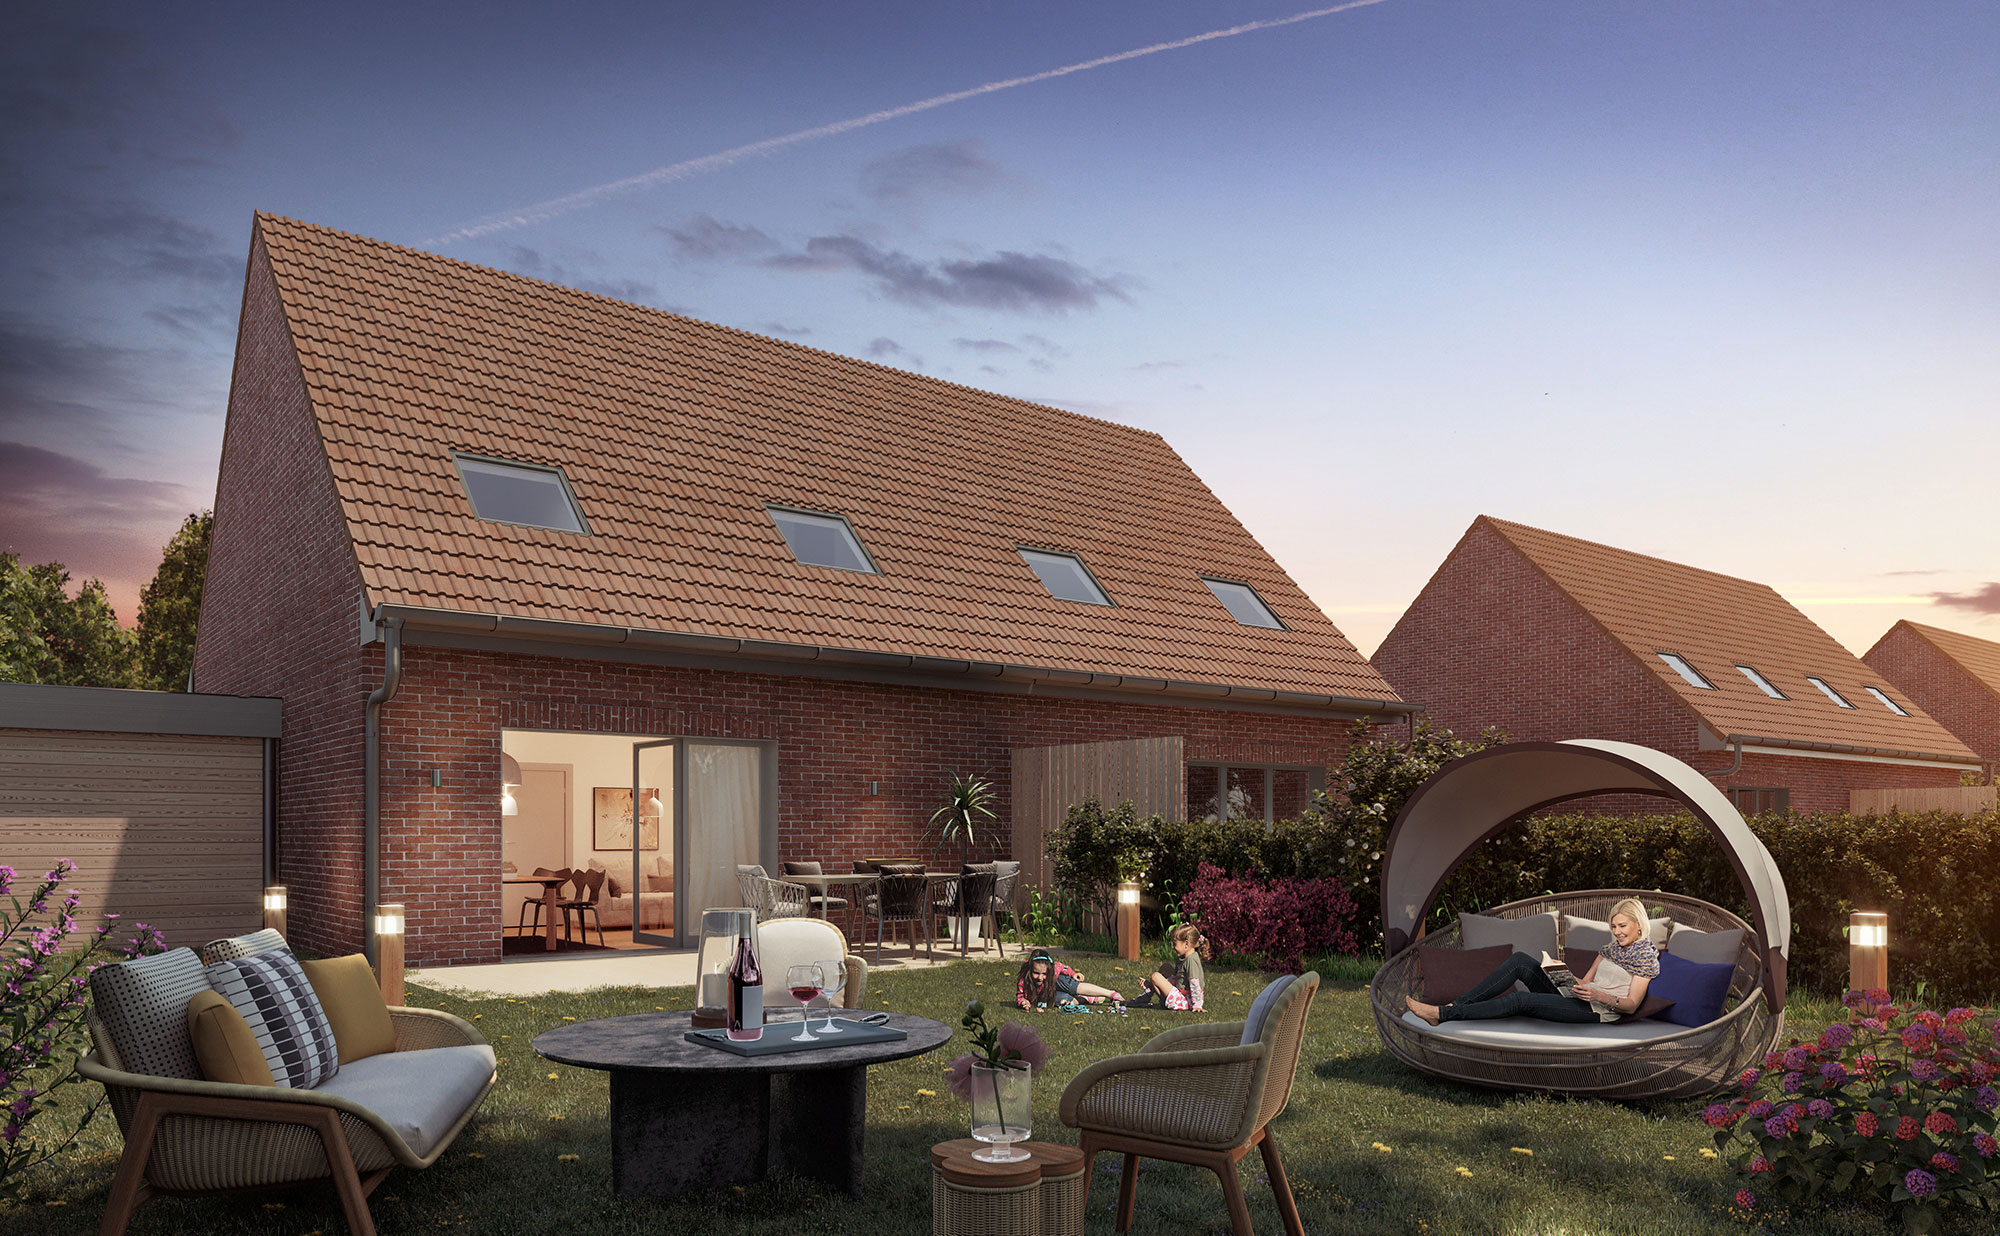
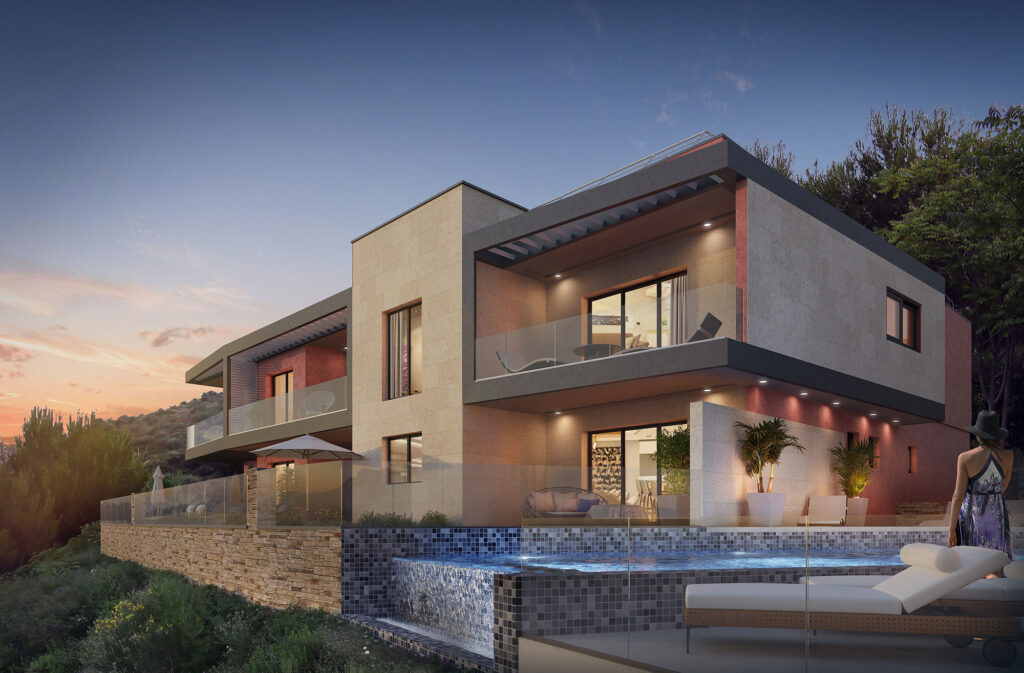
Exterior rendering
To produce a realistic and attractive representation of your building in its environment, it is possible to include strategically selected exterior rendering elements:
- Infrastructure such as roads, fences, sidewalks ;
- Atmospheric elements such as sky, clouds, fog, rain, snow
- Natural lighting with the position of the sun and projected shadows;
- Outdoor accessories such as garden furniture, lampposts, swimming pools and parasols;
- The surrounding landscape includes vegetation, trees and shrubs, flowers and lawns.
Once all the design stages have been completed, our 3D experts will check and adjust your project under the guidance of your suggestions, before finalizing and delivering it.
Let us create your 3D model