
Architectural 3D Rendering: From Planning Permission to Sales
From the PC6 insertion document to sales visuals: how architectural 3D rendering supports a development, and what developers should check along the way.
By David Dana
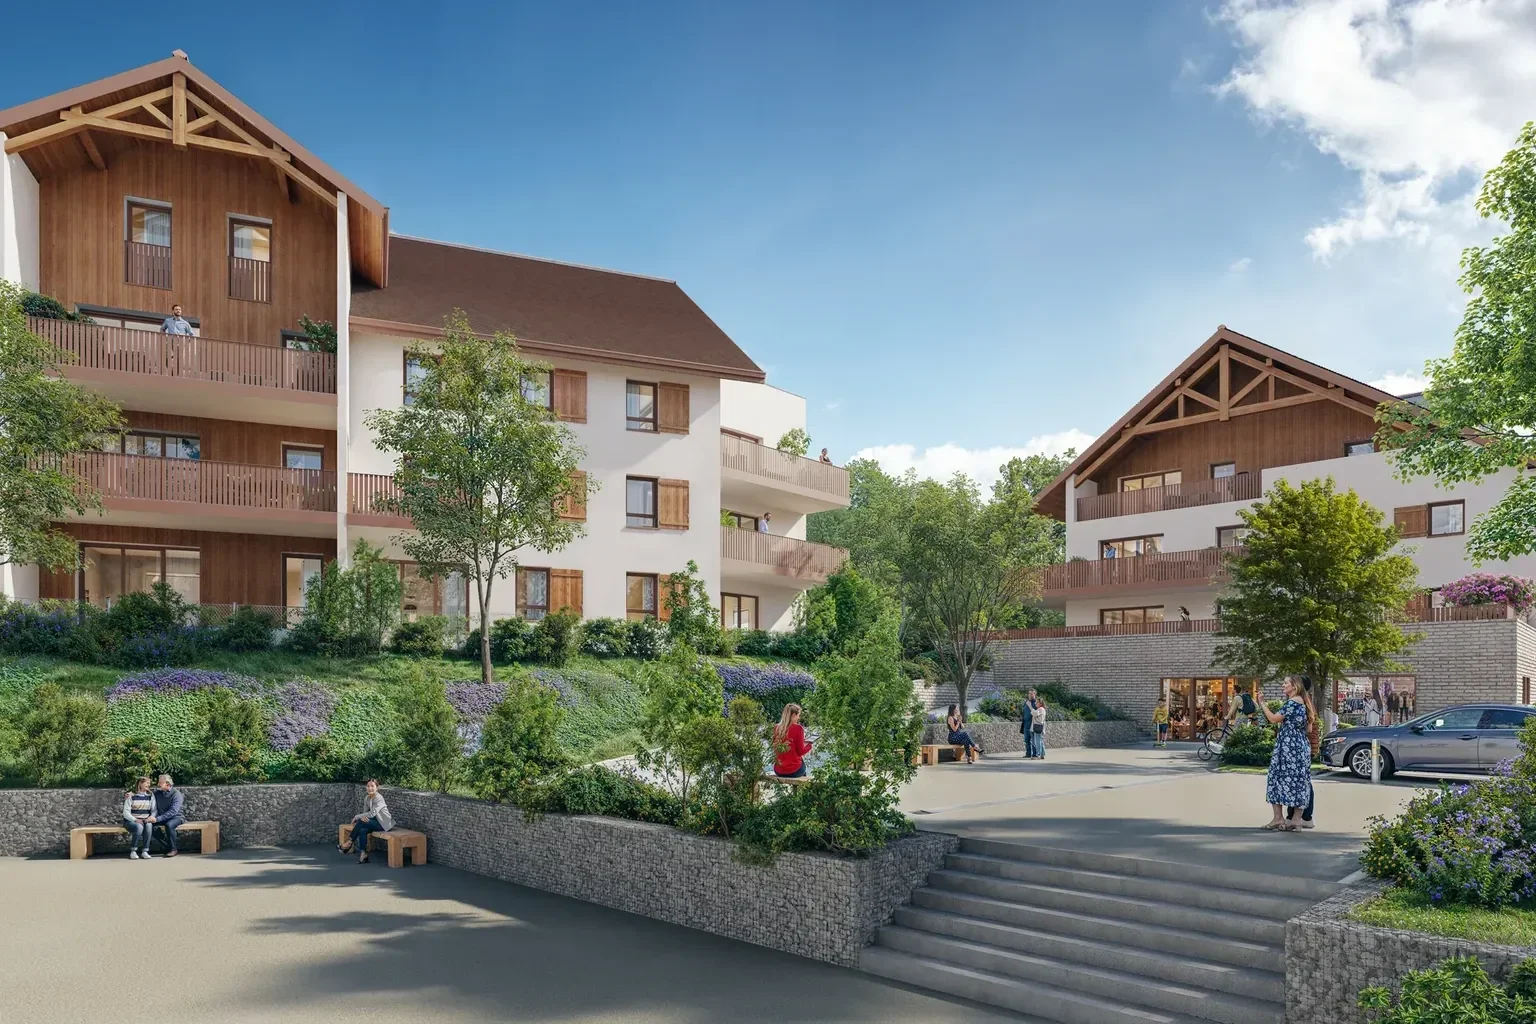
An architectural 3D rendering supports a property development long before its sales launch. It often appears at the design stage, when the architect needs to explain a volume, a façade or a site layout, and then in the building permit application (permis de construire), where a graphic document must show the project in its surroundings. It comes back later in the sales brochure, on the development's website and on the site hoarding.
These successive uses do not follow the same rules. The image attached to the permit application is there to help the authorities assess the project: it must show how the building fits into its setting, without trying to seduce. The sales image must make buyers want the home while remaining faithful to what will be delivered. In between, the project often evolves: materials are refined, planting is specified and the permit itself is sometimes amended.
This guide is written for developers and their teams. It explains what architectural 3D rendering is, the role it plays in a French building permit application, how to carry the same images through to the sales stage and which points of consistency to watch. It does not replace the advice of the project architect or of a planning law specialist, who remain the reference contacts for any regulatory question.
What is architectural 3D rendering?
A 3D rendering is an image computed from a digital model of the building, seen from a chosen viewpoint: at eye level from the street, from a garden or from the air. Unlike plans, sections and elevations, which describe the project in a technical, measurable way, a rendering shows the building as a person will perceive it, with depth, light, materials and surroundings.
In architecture, this type of image first serves to explain a design intent: a relationship with the street, an arrangement of roofs, a transition between buildings and landscape. In new-build real estate, it also becomes a sales tool. Our article on CGI in real estate covers its uses phase by phase; this one focuses on the move from planning permission to sales.
Perspective, axonometric view and photomontage
Three types of representation come up in architectural files:
- the perspective view, seen from a human or aerial viewpoint, with a horizon and vanishing lines, the closest to what a passer-by or buyer will see;
- the axonometric view, a 3D view without vanishing points, which keeps proportions and makes a whole scheme easier to read;
- the photomontage, which inserts an image of the project into a photograph of the existing site.
An insertion rendering often combines the last two approaches: the building is modelled in 3D, then integrated into a real photograph of the plot and its surroundings.
Which documents is it based on?
An accurate rendering is built from the project documents: site plan, floor plans, elevations and sections, or directly from the architect's 3D model when one exists. Materials and colours come from the permit's descriptive statement and then, for sales, from the descriptive notice (notice descriptive). The more up to date these documents are, the closer the image stays to the project.
3D rendering in a French building permit application
According to service-public.fr, the French government's information portal, a building permit application includes in particular a location plan, a site plan, a cross-section, a statement describing the plot and the project, a plan of façades and roofs, a graphic document showing the project in relation to neighbouring buildings and the landscape, and two photographs locating the plot in its near and distant surroundings (service-public.fr, "Permis de construire (PC)").
The graphic insertion document (PC6)
In the official guidance notes for planning applications (cerfa no. 51434), document PC6 is defined as a graphic document used to assess how the construction project fits into its environment, with reference to article R. 431-10 c) of the French Planning Code (Code de l'urbanisme). The notes state that a photomontage can be produced from photographs of the site and a computer-generated image or sketch of the project, and that, when prepared by a professional, this document may take the form of a perspective or an axonometric view (cerfa no. 51434 guidance notes, service-public.fr). The same notes specify that this document is not required when the project lies within an area already covered by a development permit (permis d'aménager).
This is often where architectural 3D rendering comes in: the modelled building is placed into a photograph of the plot, with its volumes, heights, colours and the treatment of its surroundings.

The documents that frame the rendering
The insertion rendering does not stand alone. It must remain consistent with the other drawings and written documents in the file, which provide its starting data. The table below lists the documents described in the cerfa no. 51434 guidance notes and what each brings to the image.
Document | What it shows (cerfa no. 51434 notes) | Planning Code article cited | What it brings to the rendering |
|---|---|---|---|
PC2 | Site plan: existing and planned buildings, dimensions and position | R. 431-9 | Layout, orientation, access, extent of outdoor areas |
PC3 | Cross-section: ground profile before and after works | R. 431-10 b) | How the building sits on the natural ground, levels |
PC4 | Statement describing the plot and presenting the project | R. 431-8 | Materials, colours, planting, treatment of boundaries |
PC5 | Plan of façades and roofs | R. 431-10 a) | Façade composition, openings, distribution of materials |
PC6 | Graphic document showing insertion into the surroundings | R. 431-10 c) | The rendering or photomontage itself |
PC7 and PC8 | Photographs of the plot in its near and distant surroundings | R. 431-10 d) | Photographic background, viewpoints marked on the plans |
The site plan plays a central role: it sets the layout the rendering must respect. Our guide on how to brief a 3D site plan explains how this document is turned into a sales visual.
An image for assessment, not a sales image
The insertion document is used to assess the visual impact of the project. An overly flattering image, exaggerated planting or neighbours left out make it harder to read and do

not serve the purpose of the document. The viewpoint, lighting and surroundings must first make it possible to understand the building in its real context.
The exact content of the file depends on the nature and location of the project, and other documents may be requested. Service-public.fr also states that a legal entity, other than a farm or an agricultural equipment cooperative, must always use an architect (service-public.fr, "Permis de construire (PC)"). Putting the file together is therefore the project architect's responsibility, and any legal question deserves the advice of a planning professional.
From planning permission to sales: evolving the same images
Once the permit is granted, the developer prepares the sales launch. The temptation is to start again from scratch; it is often wiser to build on the 3D model created for the application, provided it is updated. Our guide to off-plan real estate marketing sets out the wider sales stages this work feeds into.
A six-step approach helps organise this transition:
- Start from the approved version. Identify the plans and statement that match the permit granted, not an earlier sketch.
- Incorporate project changes. If the external appearance, footprint or floor area changes, an application to amend the permit may be needed: service-public.fr explains that it suits minor changes to the external appearance, whereas larger changes require a new application (service-public.fr, "Modification d'une autorisation d'urbanisme"). The images follow the version in force.
- Align materials with the sales descriptive notice. The permit statement gives an intention; the descriptive notice attached to the contract specifies what will be delivered.
- Define the sales views. Main façade, aerial view, inner courtyard, terraces, interiors: each view answers a buyer's question.
- Choose the moods. Daylight, late afternoon or dusk, season, people in the scene: all editorial choices to settle in the brief.
- Have the architect and the sales team approve. The former checks consistency with the project, the latter its relevance for sales.
Renderings that help sell the development
Once the model is up to date, several viewpoints can be produced for the brochure, the development website, property portals and the site hoarding.
The eye-level exterior view
This is the image buyers will recognise when they arrive on site: the main façade, the entrance, the surroundings. It is often the lead visual. Its viewpoint should remain realistic, at a height and from a position a pedestrian could actually reach.
The aerial view and the site layout
The aerial view shows the development in its neighbourhood: access, parking, green spaces, orientation. It is a natural extension of the site plan and of the permit's insertion image, with a wider frame.
Daylight and dusk moods
The same building can be shown in natural light or at the end of the day, with lit windows. Dusk brings out volumes and a residential atmosphere; it must remain consistent with the actual orientation of the plot and the planned outdoor lighting.

Interiors and private outdoor spaces
Living rooms, kitchens, balconies and terraces help buyers picture themselves in a home. These views commit the specification more directly: visible finishes, joinery and fittings must match the descriptive notice, as explained in our article on the VEFA descriptive notice and 3D renderings.
Keeping the permit image and the sales image consistent
A buyer, a neighbour or a local councillor may compare the image on the site hoarding with the one in the permit file. Major differences between the two undermine trust, even when they are explained by changes to the project.
Points to check
- volumes and heights, identical to the approved plans;
- façades: rhythm of openings, balustrades, colours and materials;
- surroundings: fences, access, parking and planting, shown at a credible stage of growth;
- neighbouring buildings, neither removed nor embellished;
- staging elements such as furniture, people and vehicles, which must not suggest features that are not planned.
Our checklist for reviewing and approving 3D renderings offers a point-by-point review method before publication.

What the image commits to
A sales rendering remains a communication tool. According to ANIL, France's national housing information agency, "advertising documents have no contractual value": buyers must refer to the specification attached to the reservation contract (contrat de réservation) (ANIL, "Achat sur plan"). This does not permit an approximate representation. The choice of wording accompanying the images, and its compliance with the applicable rules, are matters for a lawyer or the developer's usual adviser.
Preparing an order for architectural 3D renderings
For a studio to produce accurate images from the first proposals, the file it receives must be complete:
- the project plans in their approved version, or the architect's 3D model;
- the permit statement and, if available, the sales descriptive notice;
- photographs of the site, especially those from the permit file if an insertion is planned;
- the list of views required and the intended media: permit application, brochure, website, site hoarding;
- mood references: season, time of day, how many people to show;
- the schedule: permit submission date or sales launch date.
Stating from the outset that a view must serve both the permit and the sales stage avoids building the same model twice.
One model, two uses to keep distinct
Architectural 3D rendering accompanies a development from the permit application through to sales. The insertion image must first make the project readable in its surroundings; the sales image must make it desirable without departing from what will be delivered. Building an accurate model, keeping it up to date with every change and having each view approved by the architect makes it possible to move from one to the other seamlessly.
For your insertion renderings as well as your launch visuals, VIZION STUDIO can start from your plans or from your architect's 3D model and adapt a single scene for every medium. Discover our 3D Rendering service and request a tailored quote by sending your plans, your descriptive statement and the list of views you need.
3D services to bring your project to life
Preparing a property launch or an architectural presentation? Explore deliverables and examples relevant to this topic.
Frequently asked questions about architectural 3D rendering
What is architectural 3D rendering?
It is an image computed from a building's digital model and seen from a chosen viewpoint, showing the project as it will be perceived, with its volumes, materials, light and surroundings. It complements plans, sections and elevations, which describe the project in technical terms.
Is a 3D rendering required for a French building permit?
The application includes a graphic document showing how the project fits into its surroundings (document PC6); according to the official cerfa no. 51434 guidance notes, it can be a photomontage or, when prepared by a professional, a perspective or axonometric view. This document is not required within an area covered by a development permit (permis d'aménager), and the exact content of the file should be checked with the project architect.
Can the permit rendering be reused for sales?
The 3D model built for the application can be the basis for sales visuals, provided it is updated with the approved version of the project and the descriptive notice. Sales views often differ from the insertion image in framing, mood and staging.
What happens if the project changes after the permit is granted?
According to service-public.fr, minor changes to the external appearance can be handled through an application to amend the permit, whereas larger changes require a new application. Renderings must follow the version in force; the architect or a planning lawyer can confirm the right procedure.
How do I request a quote for architectural 3D renderings?
Send the project plans, or the architect's 3D model, along with the statement, site photographs and the list of views you need, from the 3D Rendering service page or the Contact page. The team prepares a tailored quote based on the number of views and the planned media.
Give your project the images that will sell it
Get your first 3D image within 72 hours. Custom quote, no commitment.